Monday 27 October 2014

Time For A Post Mortem

This week marked the end of the Film Room project. I really liked this project although it was sometimes a nightmare.
I've learnt a lot over the last three weeks which is why I really enjoyed this group work as I've learnt loads of new techniques and shortcuts for things within 3ds max and UE4.


So the Film Room project. In a quick analysis I would say that it went pretty well! Personally I'm really proud of our final scene, it's also pretty damn close to the original. 


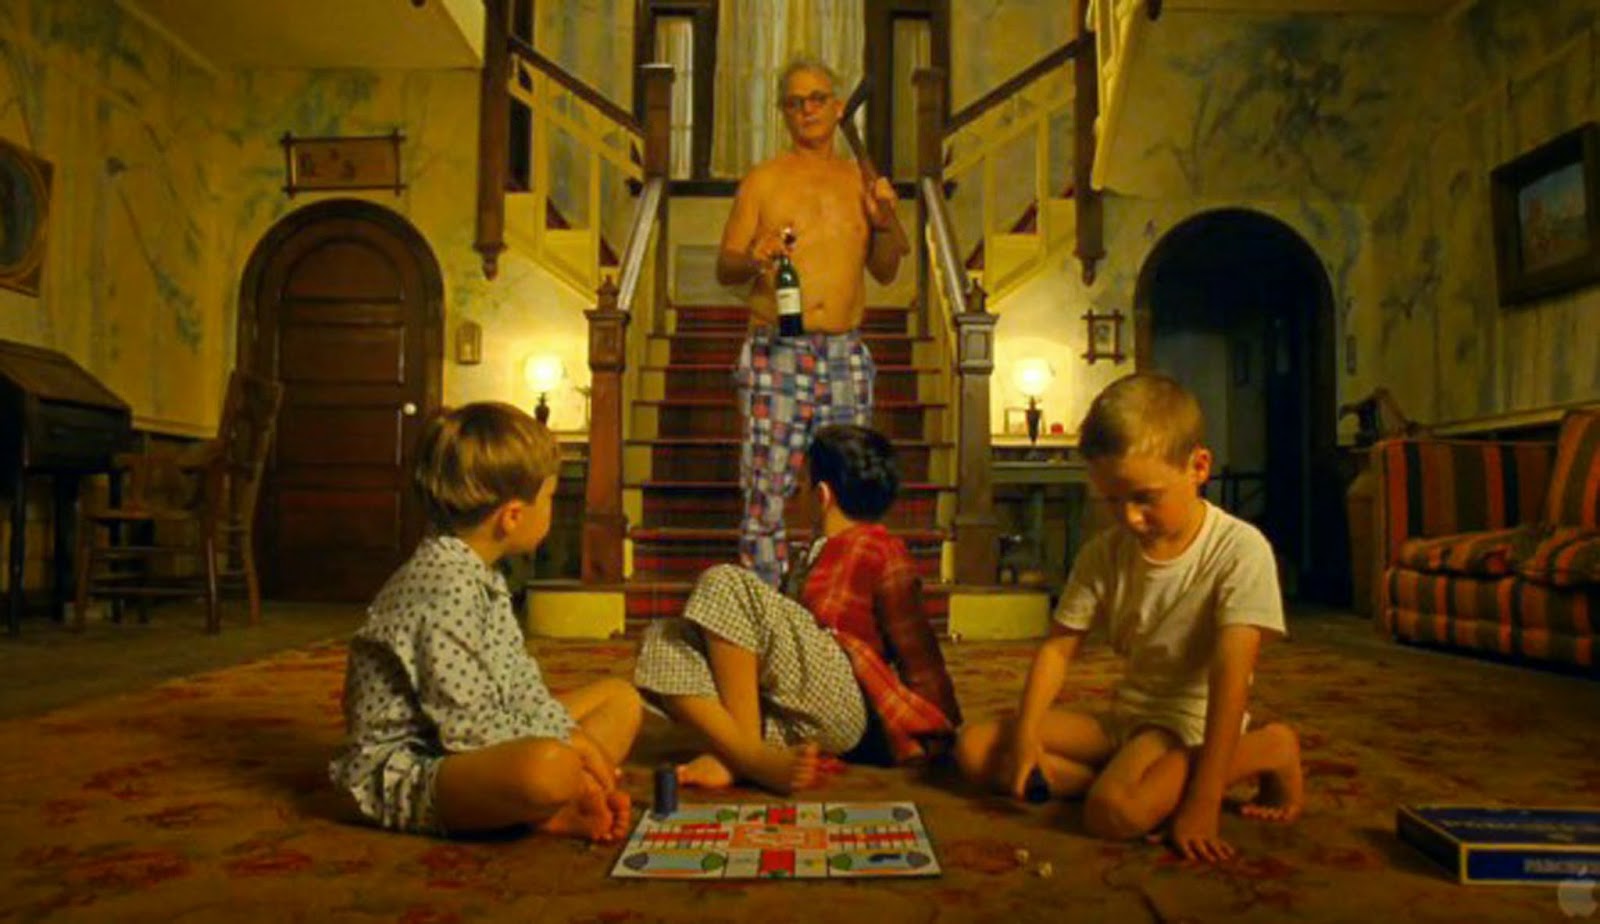
Looking at the images side by side I can see there are still a lot of issues however on the time scale we had I think we managed to get similar results. One of the main issues I'd say is the lighting as we had lots of problems trying to get it exactly the same, this meant we went through many iterations before the final lighting you can see. In my opinion I think the lighting is really hard to replicate because when filming they probably had off screen lights which is hard to reproduce and due to post production filters, the lighting is still different from what we managed to make. 

So although there are issues with the final outcome I still think we did a good job and we definitely made a good team. 

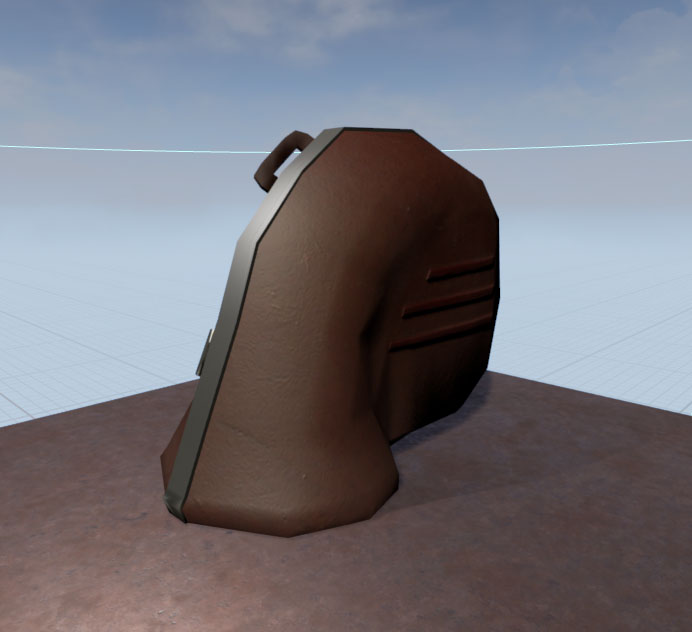
Here are the assets I produced:


I had some issues with the alphas on the ceiling light not actually being translucent at all. 


As you can see in the image above the alphas are not working as they are completely opaque. I had tried plugging in the opacity multiple times and it just was not working. Thankfully Mark told us that he had seen a YouTube video showing how to create a glass material in UE4.


This was the what we had to do to get the alphas to work properly. We had to plug in a Lerp, several Multipliers and a Fresnel. As you can see below it definitely worked.


I think if we had time to go back to this project in the future we would sort out the lighting and dedicate a lot more time to it. Also our stretch goals would be to add interactive elements to the scene and have some animation.
Finally to finish off this blog post here are some final scene renders! 


Sunday 19 October 2014

Model Making and Some Pegs

For the Film Room Project we had to make a physical model for of the room that we had chosen. So a week or so ago we had a lesson with Jack who showed us his architectural work which had some physical models included. After seeing these it gave us an idea of what we had to do in the couple of weeks that followed.

To start off the model, first we had to buy some materials. We went into town and to the art shop to get some ‘kappa board’ which is the material Jack had suggested we used, we also got some card.

First off we had to scale the 3d scene to the size we wanted to make it as a physical model, personally I found this confusing but that might just be because I’m not very good at maths. However we got all the scaled measurements done in one lesson and had started to cut out the shapes of the main exterior walls.

Next we decided to meet up at Luke’s and work on the model for a bit more as we had only just started it and we wanted it done pretty quickly so we could focus on our 3d work.
When we met up we had all the walls cut out and finished already, so we made a start on fixing the walls to the base we’d set up. We did this using pins so we could dismantle it really easily and reassemble it quickly.


For the rest of the time we had together for that night we managed to make most of the assets to go into the room. Some of them had to be redone as they weren't the correct scale and fit into the scene properly. So after meeting up we had done most of the model and just had some little things to finish the week after.


On Friday’s lesson this week we had to finish of the model. During this lesson we realised some of the assets needed re making and we had actually missed a few things like the ceiling light, the banisters for the stairs and the window at the back of the scene. So we all had something we needed to be doing, I had to re make the French horn case as it had gone missing at some point and we couldn't find it, I also helped make some of the banisters. Whilst Mark got to added the larger bottom step to the stairs and adding some detail to the window. Georgia had made the ceiling light ingeniously using some tin foil for the circular lamps.


So this Friday we got the model finished! And in my opinion it looks pretty decent. The only thing left to do now is to give it some proper lighting like it is in the real scene, which we’ll hopefully be able to do next week. 


And as a treat for reading through this here's a nice little picture of Luke and Mark being super productive! 


Texturing and UE4

 As I said in my previous blog post I've been working on my textures and I've thankfully finished them now. Each asset was rather simple to texture however the French horn case and ceiling light were both a bit tricky. 

For the French horn case I made a few different ‘leather’ textures for the main case and I tested each one to see how they looked in engine. It’s safe to say my first two didn't look good at all, so after reviewing how they looked I made a third texture which worked a lot better once I’d put in engine, so that was the texture I had decided to use. I also added a normal map to the main case as there are a few horizontal ridges that stick out.


Next on the horn case, I had to make the metal strip that runs along the outside of the case where it opens. This was fairly easy as I just colour picked the ‘iron’ from a chart made for the albedo maps and added some detail for the hinge. Most of the detail for the metal part of the horn case was made with the metalness map and roughness map which determined how glossy and reflective the material was. I didn't want the metal to be too shiny as it’s quite an old horn case and in reality it wouldn't look shiny and new.
I also added some scratches and wear and tear using the normal and roughness maps.


first iteration on metal

second and final 


The vase was really easy for the textures as its pretty much all just one grey/brown colour with a small golden pattern. For the pattern I used a normal map to bump out the circular shapes as from the reference it looks like they’re 3d and pushed out. After that I just added some bumpy sections and scratches to the roughness and normal maps to make the vase look like a bumpy material.


For the ceiling light I colour picked ‘gold’ from “Dontnod Entertainment” colour chart for albedo map flat colours. I changed the colour slightly as it was too bright for what I wanted so using the levels function in Photoshop I made it slightly darker. I also made the alpha for the actual light shades on the ceiling light. After doing this I added wear and tear to the metal using roughness and normal maps as this wasn't a brand new ceiling light, it had been there for quite awhile so I wanted to make it look pretty worn. I also used the roughness map to make sure the ceiling light wasn't too glossy and reflective but still had some shine to it.


For the ceiling light the alphas on the actual lamp are currently not working properly and I plan to solve that tonight so it's all working and ready for engine tomorrow.


Overall after putting each asset into UE4 and reviewing how the textures looked I’m quite pleased with how they all look. Next I will put them into the scene and see if they work with the rest of the assets which I think they should.

Saturday 18 October 2014

Modelling and Texturing Is My Life (thank god for PBR)


This week carried on with the Film Room Project. This meant lots of modelling, texturing and hours spent fixing problems with perspective, tri count and getting those all important textures just right.

Another Dragon's Den session was also scheduled for this week which required a presentation from us on what we've done so far and where we will be according to the time scale and deadline. This gave us a chance to have feedback on our work so far meaning we could make any necessary changes with enough time to finish for the deadline. 

So for this week's Dragon's Den we all talked about and presented the concepts we had drawn up and the models we had made so far which were well received.
The main issue arose when we showed our white box, the tutors pointed out very quickly that the perspective and camera angle was completely off. 


original screencap

white box


We really figured this out when we pulled up the white box against the screen cap we were replicating, we could all easily see that the camera was way too high up compared to the actual shot. After the session we immediately fixed this problem and now the perspective is correct. So it shows that these Dragon's Den sessions are very helpful and really told us what the next task to do was. 

Throughout the week I carried on with modelling the assets I had been given, these were the ceiling light, vase and the french horn case. Modelling the assets was actually pretty straight forward for the most part, the ceiling light was super easy and quite fun to do, and the vase was very simplistic. However the french horn case was a bit of pain, the shape of it meant I had tried many ways of replicating it. Some using a cylinder and a box and trying to attach them together to create a nice fluid shape and another way was to completely strip model the whole thing, this meant I had gone through many iterations of this model to get the final just as I wanted it. 


first iterations


french horn case second iteration

After finishing modelling I had started to create the textures for them, however I had to stop after Mark had figured we'd gone over the tri budget by quite a bit, meaning we had to go back to our models and bring down the tri count. I had managed to lower all of my models by a significant amount and thankfully it didn't take very long at all. 


first iteration

lower poly

lower poly

However the hardest model to lower was the french horn case which took at least a couple of hours. I had to get rid of many swift loops and had to redo the topology so it still looked correct. I'm pretty proud of how low poly I managed to get it though, from 1300 to 400 roughly is pretty good! And it also kept its shape which I'm pleased about because for me it was a challenge to model in the first place. 

second iteration

lower poly

Fixing these problems meant I could then go back to texturing after re unwrapping the models. It's taken a few days but I'm actually done with the texturing ahead of schedule and I'm just tweaking the roughness maps to make each asset look just right. I plan to go into more detail on texturing in my next blog post so keep your eyes peeled for that, it's gonna be banging! 


Saturday 11 October 2014

Film Room Fun!

So week one/two brought about the next project; The Film Room.
We had to pick a screencap from a film which we would then create as a static 3d scene, this was also another group project. 

The film could be practically anything we wanted, but of course we were encouraged to be original and go for something that we maybe wouldn't automatically look at. This in fact made the project more interesting in some aspects because I found that it broadened my ideas and I watched some films that I would have never picked on my own.

First off on this project the whole group created moodboards of scenes we liked from different films. We shared these with eachother and reviewed them a bit, narrowing the list down to more of a top 5-6. Here are some moodboards I created. 


After this we were told we had to present our moodboards and ideas in our Critical Studies seminar class, in this class we got feedback from a selection of tutors which helped us to refine our choice down to maybe 2 or 3 possibilities. After this feedback as a group we had some deliberation between doing the attic scene from Sweeny Todd or the staircase room from Moonrise Kingdom, as both of these scenes received positive feedback from the tutors.
These are the two screencaps we were deciding from. We were told not to model characters into the scene as that isn't the purpose of the project, so we would take them out. 


We had pretty much decided on the scene from Moonrise Kingdom so we all went off and did some different studies of the screencap.
This included some concepts of the room in different shots, colour palettes, thumbnails and some paint overs. 
Georgia had done some awesome concepts of the room and assets that we needed to make in the room which are shown below.

Georgia's concepts 


 While Lucy had created a white box of the staircase and surrounding assets, whilst I had done a really quick and simple block out just by doing a paintover.


Lucy's white boxes


My quick paintover and colour pallete


The next week we were starting on 3d modelling the assets. To do this we had to have the main room built in 3d to scale and with the correct perspective. We were taught how to do this in our Game Production lesson of that week.
Mark had done a great job in creating the room scene in 3d which was important as we all needed it to be accurate so we could have each asset scaled and look correct in the scene. As the brief is to replicate the scene 100% accurately, this was a very necessary step and it was completed to an awesome standard in my opinion.


During this week we had another session in our Critical Studies seminar when we had to present our final idea and the work we had done so far to the tutors. Thankfully ours had the word of approval and we were able to carry on with it. Seeing as most of us had already started to model the assets this was great news! 
So following this session we had started a project plan of what each person was modelling and their budget for the asset, we made a spreadsheet to plan this effectively. 


So following the spreadsheet I was to model the chandelier, french horn case, vase and the storage/basket furniture. I started off by doing some quick sketchy concepts of each object I was set to model.


I'm now onto modelling and I should be finished by the end of the weekend and definitely Monday. 

Sunday 5 October 2014

Level Up! - Second year has begun!


Starting the second year! Exciting? Yes! but maybe slightly stressful.

So this week was the beginning of my second year studying game art. This meant some new tutors, new ways of creating textures and group work!

To start the week of we were introduced to PBR which is Physically Based Rendering. Which basically means using Albedo maps instead of Diffuse and adding a roughness and metalness map. But how is that different? Well it means using realistic lighting/ shading models to make a more accurate representation of real world materials.
In short, lighting is super realistic and looks awesome in game engine.


The introduction to this however was slightly confusing and very stressful. Having no clue how to use PBR in any sense, it required some research into the topic and lots of playing around in 3ds max and Photoshop, but I understand it now after using it in the first project of the year which I will talk about next.


So, the first project of the year. It was a group project, it required using completely new concepts (PBR) and new software!

This project was called the Asset Swap, which means we had a certain amount of assets to make and each of us would work on each one, all doing different things on each asset.
For example I concepted a shield, modelled a barrel and textured a bench then put each asset into engine. After understanding and slightly mastering PBR this project was lots of fun and gave me the opportunity to work with people I hadn't before. 


I also realised that with group work communication is key, so we all made sure we could contact each other easily, by doing this and working together quite closely we were able to get the project done quickly and effectively. Overall I enjoyed the project, as a person who is generally more likely to work alone than in a group, I think that's pretty important.


This week also meant going back to life drawing! I had definitely missed it and I'm enjoying the class a lot, especially as there are less people in one class it makes it more enjoyable. For the first lesson we used a technique we had used the previous year. This involves covering A2 paper with charcoal and erasing gently to make the figure appear out the paper. Not one of my favourite ways of working, but hey practice is practice! 


We also have the next project started. This is called the Film Room project and it's another group project. I'm pretty happy with my group and we already have the film that we're going to work on. So I'm currently feeling pretty confident about this project at the moment and hopefully that will carry on. We'll see how next week goes!