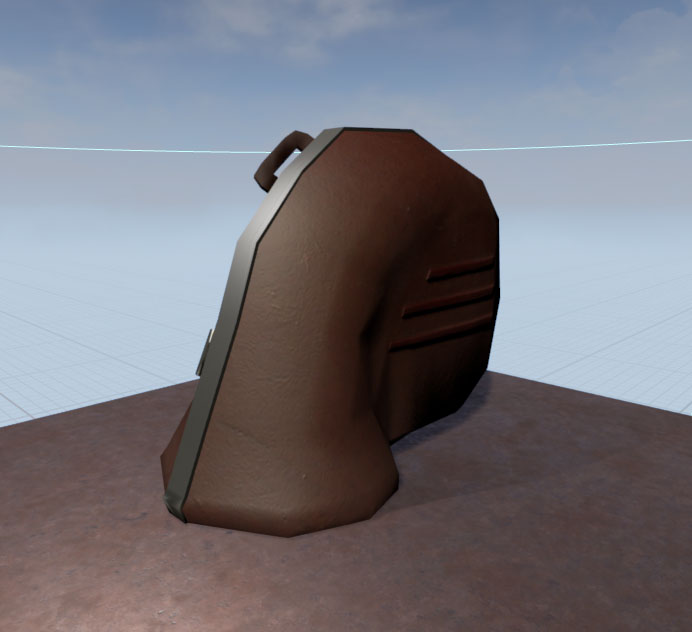
For the French horn case I made a few different ‘leather’ textures for the main case and I tested each one to see how they looked in engine. It’s safe to say my first two didn't look good at all, so after reviewing how they looked I made a third texture which worked a lot better once I’d put in engine, so that was the texture I had decided to use. I also added a normal map to the main case as there are a few horizontal ridges that stick out.
Next on the horn case, I had to make the metal strip that runs along the outside of the case where it opens. This was fairly easy as I just colour picked the ‘iron’ from a chart made for the albedo maps and added some detail for the hinge. Most of the detail for the metal part of the horn case was made with the metalness map and roughness map which determined how glossy and reflective the material was. I didn't want the metal to be too shiny as it’s quite an old horn case and in reality it wouldn't look shiny and new.
I also added some scratches and wear and tear using the normal and roughness maps.
I also added some scratches and wear and tear using the normal and roughness maps.
 |
| first iteration on metal |
 |
| second and final |
The vase was really easy for the textures as its pretty much all just one grey/brown colour with a small golden pattern. For the pattern I used a normal map to bump out the circular shapes as from the reference it looks like they’re 3d and pushed out. After that I just added some bumpy sections and scratches to the roughness and normal maps to make the vase look like a bumpy material.

For the ceiling light I colour picked ‘gold’ from “Dontnod Entertainment” colour chart for albedo map flat colours. I changed the colour slightly as it was too bright for what I wanted so using the levels function in Photoshop I made it slightly darker. I also made the alpha for the actual light shades on the ceiling light. After doing this I added wear and tear to the metal using roughness and normal maps as this wasn't a brand new ceiling light, it had been there for quite awhile so I wanted to make it look pretty worn. I also used the roughness map to make sure the ceiling light wasn't too glossy and reflective but still had some shine to it.

For the ceiling light the alphas on the actual lamp are currently not working properly and I plan to solve that tonight so it's all working and ready for engine tomorrow.
Overall after putting each asset into UE4 and reviewing how the textures looked I’m quite pleased with how they all look. Next I will put them into the scene and see if they work with the rest of the assets which I think they should.
No comments:
Post a Comment